 to add an item to your Itinerary basket.

Wreaths are such a versatile decoration, they can adorn your front door, chimney breast, fireplace, feature wall, interior door or even garage door and depending on what colours, style etc you use! You can even have a wreath up all year around - not to mention they also make really lovely gifts!
.jpg)
Shabby Chic Rag Wreath
One of the easiest wreaths you can make is a rag wreath, suitable for indoors or a sheltered front door. They are a great way to recycle/upcycle fabric you have already at home such as old bedding, curtains, net curtains, blouses or shirts - anything that has enough fabric to cut into measured stripes and isn’t to too thick is suitable for this type of wreath!
Equipment:
- Metal wreath ring circular or heart shaped make sure they are made of an outer circle and a slightly smaller inner circle in the size of your choice (can be bought online or in hobby/craft shops)
- Various fabrics of your choice (we suggest at least 3 different variations) to give your wreath real detail and interest
- Create a card template 3cm x 15cm
- Ribbon or string to create hanger if required or you can just hang by the metal wreath ring
- Optional extras such as clip on or tie on Christmas decorations e.g. clip on charms, butterflies or bows
Method:
- Using a large flat surface (put down a protective cover) lay out your fabric and using your card template cut out your fabric stripes – you will need a decent amount
- Plan in which order you are going to use your fabric. Do you want it to have a random pattern or do you want the busier patterns on the outer circle so framing your wreath and lighter/paler patterns in the middle of the wreath? There’s no right or wrong, it’s whatever appeals to you!
- Starting with the outer circle, take a single strip of fabric and fold it in half (with your pattern on inside and the 'wrong side of fabric' on outside)
- Put the folded fabric under the metal ring, take the cut end and loop through the folded end securing it to the outer metal ring only pulling tightly. (Once all rags are on you will then part the ends to show the pattern/right side and give volume and shape to the wreath)
- Take your second piece of fabric, fold in half and tie it to the outer circle next to your first one making sure it sights as close to the first as possible
- Take your third piece of fabric and then keep repeating steps 1 and 2 until the whole of the out of ring is completed with tied on rags
- Repeat the process on the inner circle
- Once completed, take the time to ensure all your rags are fluffed up to give your wreath a full shape
- Add on any extra decorations at this point as well as tying ribbon or string if required to hang wreath
Pom Pom Wreath
Equipment:
- Pom poms handmade various colours (for instructions below)
- A piece of cardboard
- A circle template such a a glass
- A small template such as a coin
- Pen
- Scissors
- Wool various colours
- Polystyrene wreath or metal wreath ring
- Glue gun
Method:
- Draw around the glass on the card and place the coin or small template in the middle and draw around this. Cut out the circle and the small central circle. Repeat this again so you have two circles. The distance between the inner and outer circle will determine the size of the pom pom – make sure the smaller circle isn’t too big or it will make tying the pom pom when finished trickier
- Hold both cardboard rings together and cut a slit through from the outer to inner circle twice so you have a 1/2cm break in the circle - this will make it easier to wrap the wool for your pom pom
- Start to wrap the wool, the thicker you wrap the wool the fluffier your pom pom will be
- Once you are happy with the amount of wool wrapped around your templates, start cutting the wool by pushing your scissors between the two discs and cutting around the outer edge while carefully holding the templates to ensure the wall doesn’t fall
- Get a long piece of wool and wrap in between the two cardboard rings, pull tightly as possible to secure the wool.
- Remove the cardboard and your pom pom is complete. Repeat steps 1-6 until you have enough pom poms to cover your wreath
- Use the glue gun to stick the pom poms to the polystyrene wreath until the whole wreath is covered. Alternatively, tie the pom poms to the metal wreath ring, using the wool lengths originally used to tie the pom pom in the middle. On both styles in can be fun to use different size and colour of pom poms
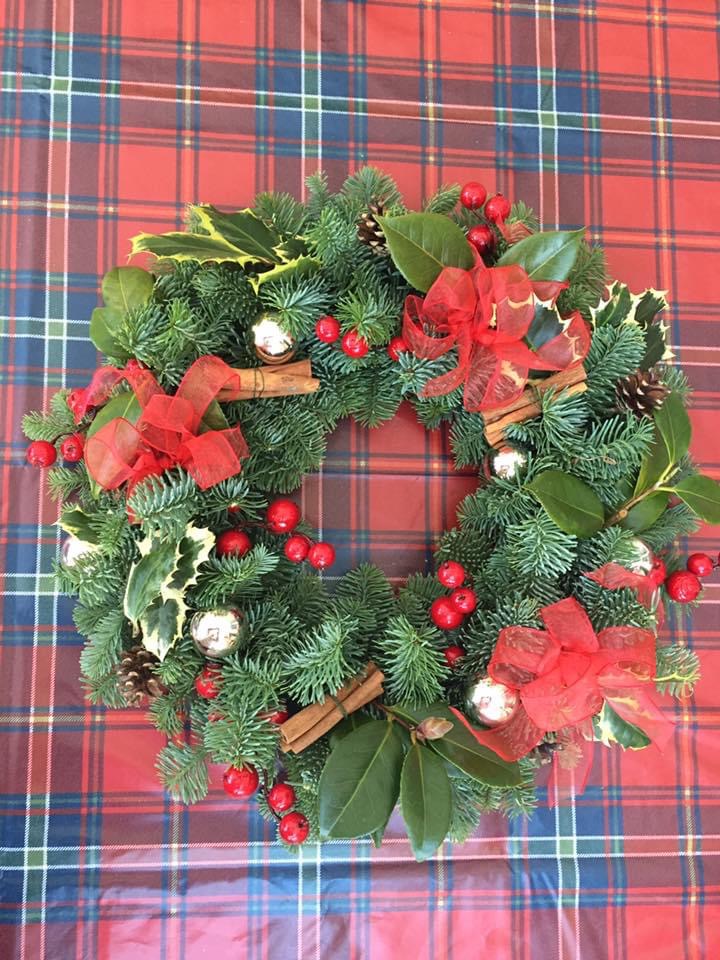
Traditional Fresh Wreath
Of course you can buy a fresh wreath, but if you have suitable plants and trees in your garden to take cuttings from - you can make one yourself as either a centre piece for your table or to hang on your door!
Equipment:
- Wet oasis wreath with a plastic backing
- A covering to protect your work surface
- Thin garden wire
- Florists’ wire
- Secateurs
- Foliage - a variety of greens, for example firs, holly including berries and ivy
- Accessories such as ribbon, cinnamon sticks, dried orange slices, pine cones and small Christmas baubles. If you wish to make a table centre you may wish to add tapered candles
Method:
- Cover your works space with a protective cover. Cut a metre of the garden wire, wrap at least 3 times around one side of the oasis, then twist the remaining length together round the back of your oasis and then make a loop to hang your wreath on. Twist around the base of your loop until it is secure enough not to snap
- Fill a sink with water and place your wreath oasis side down and allow the water to gently soak into the foam
- Start with the stronger foliage, strip off the ends to give you a good prong to poke into the oasis. You’ll need to fill the wreath across the top, outside and inner edges to give a uniform look
- Start building up and filling in the gaps with the other foliage you have chosen
- Finally add the accessories, use the florist wire to secure the ribbons, pine corns to the wreath by threading through the ribbon etc and twist the ends together to make a prong
Related
Comments
Comments are disabled for this post.


