 to add an item to your Itinerary basket.

Arts & crafts are good for the soul... and your home! Take a look at our ideas for inspiration what to do on a rainy day, or whenever you fancy during your 'Exetercation'...
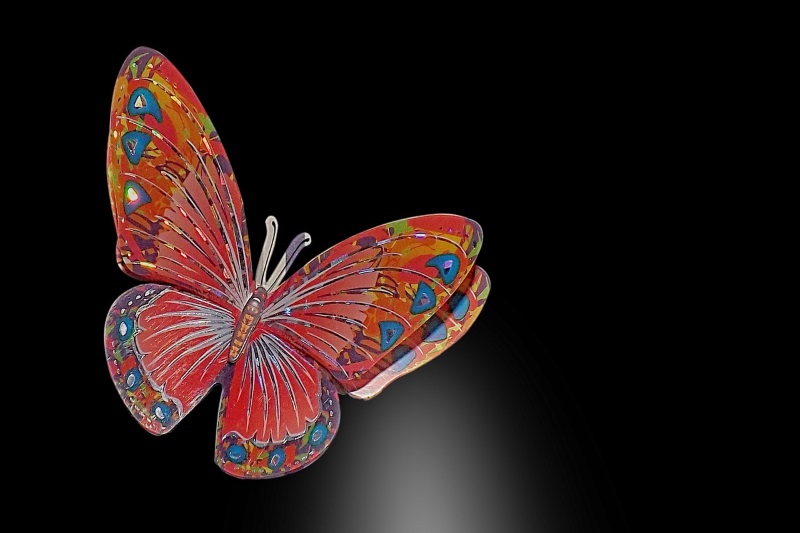
Butterfly wall art
This is perfect for all children once they are old enough to grip a paint brush. Why not make a family of butterflies to pin to your walls or even curtains!
Checklist:
- Good quality paper that won’t tear when folded.
- Water based paint, that type that comes in a bottle or tube
- Paint palette or old plate you don’t mind getting paint on
- Paint brushes- as thick or thin as you like, chose the right ones for your child’s age.
- Scissors
- Pencil
Method:
- Fold a piece of paper in half and then unfold again so you can see the fold mark down the middle.
- You can either draw your butterfly on at this point, using a template and ensuring the body is matched up with the half way line or you can wait until later to do this stage.
- Squeeze your different colour paints onto your palate/paint, if you want to blend any colours do that now.
- Add paint to one side of the paper only – go right up to, but do not pass the mid fold that you can see, add the paint generously and in whatever pattern you want.
- Fold your paper in half again along the original fold so your painted half is touching your non painted half.
- Smooth over the folded paper with your hand ensuring the painted half has touched all of the non-painted side, then very carefully so not to rip the paper, slowly peel the paper back open and you will see you have a mirror image of the paint on the opposite side.
- Leave to dry
- Once dry you can add a dark painted butterfly body down the middle fold of your picture and if you had already drawn your butterfly template you can now cut it out, if you hadn’t already, you can now draw your butterfly’s wings on both side using your dry painted pattern as their design and cut out your butterfly.
- If you secure it to your wall by the underside of the body only it will give a 3D effect to your wall art, you can create these in varying sizes and shape to add interest.
Marble effect a mug
These instructions are for a mug, but this technique can be used on any non-porous item, for example a vase, glass, pencil pot, or plate. We suggest doing this in a well ventilated area as the smell of nail varnish is strong, this project is not for young children, although I’m sure you could let them assist by picking the colours.
Checklist
- Plain coloured mug (white works best but it depends what colour marbling you want)
- A plastic container (one you don’t mind ruining or keeping for craft projects and also deep enough to dip your mug into , whether you want to just marble half the way up the mug which is a cool effect or the whole mug).
- Nail varnish of various colours, (not quick dry versions) try to include a metallic colour such as gold or silver if you have one. You can just use one colour but no more than 3 or 4.
- Tooth picks or cocktail sticks
- Kitchen roll
- Nail varnish remover
Directions:
- Fill the plastic container with hot water (not boiling but the hot water slows the nail varnishing from setting too quick
- Drip in the first colour nail varnish, hold the bottle close to the water surface so the drips sit on the surface rather than sink.
- Drizzle in the second and third colours individually but not too much.
- Using the toothpick or cocktail stick carefully swirl the colours around on the surface of the water in the container, you want marbling rather than blobs. You need to act quite quickly.
- Pick up your mug around the top and dip directly into the water, do not let the bottom of the mug touch the bottom of the container and then pull back out.
- Use nail varnish remover to tidy up any of the bits that have run or gone inside of the mug, or to wipe off the bottom of the mug if you just want the pattern on the sides.
- Turn your mug upside down and leave to dry for a few hours
- You can buy a dishwasher proof version of mod-podge to coat your fabulous marbled mug in which will help make your pattern last longer but it isn’t essential.
- If your project doesn’t work out quite as planned use the nail varnish remover to wipe it all off and start again – practice does make perfect.
- Please note these mugs will no longer be microwave proof as nail varnish is flammable.
Decoupage summer memory box
Memory boxes are a great way to store items that you want to keep because they spark a special memory, but they don’t necessarily fit in a scrap book and may end up getting damaged or thrown out while you figure out what to do with them. With most photos being digital the odd treasured printed one can get lost with no album to hold it.
Some people have memory boxes of special occasions such as “big” birthdays, a wedding or the birth of a child. Items include such things as an individual invitation, the cork off a special champagne bottle, the ticket to a concert or a holiday, the special message card from a bouquet, a birthday sash, dried flowers from a bouquet, a child’s first bootie etc.

But memory boxes are also a good way to remember a holiday or a period of time, and can even be used as a type of time capsule, the joy of opening a box of “treasures” from previous years trigger memories and happy thoughts long forgotten and it’s a great way to reconnect with the past.
Pretty much any container can be used from plastic tubs, wooden storage boxes, shoe boxes or parcel delivery boxes. Although it is better to pick something with a proper lid to keep the contents dust-free. Once you have your chosen container decide how you would like to decorate and personalise it. Here’s an example:
Checklist:
- Shoe box
- Craft mat
- Craft glue for example mod-podge (other brands are available)
- Paper in different patterns and designs
- Scissors
- Clean paint brush
- Small tub of water
- A clean cloth or sponge
Directions:
- Turning a shoe box into a summer memory box, using decoupage
- Decide what design you would like to use for your decoupage, you can buy specific paper for decoupage which is fine with an almost tissue paper consistency, but gift wrap, posters, magazines or even normal printer quality paper can be used.
- With decoupage paper you can either rip it haphazardly into small pieces which will then cover the whole box building up the pattern or shape , or you can carefully cut out specific images or motifs and just add elements of pattern to just the lid or around the edge of the box.(you can decoupage the inside of the box and lid as well but it’s not essential)
- I would recommend a combination of both techniques , start with a chosen back ground , for example paper with a blue sky pattern, rip this up haphazardly into small pieces no bigger more than a few centimetres in size, this makes manipulating it around corners a bit easier and you won’t be left with bulky folds of paper.
- Once you’ve ripped up enough paper, paint a thin layer of glue over a small section of the box
- Pick up an individual bit of paper by lightly touching it with your glue brush and place it on to the glued surface of the box, use the brush to smooth out any creases or folds in the paper coating it with a thin layer of glue as you do.
- Pick up a second piece of paper in the same manner as the first and add it to the box, slightly overlapping it with the first piece of paper, continue doing this until you have covered the whole area you wish to with that pattern
- NOTE if you have chosen to use a slightly thicker paper than decoupage paper then this is a tip to make it more pliable for decoupage, rip or cut the paper into small pieces as per original instructions, slightly dampen the pieces of paper either by brushing water onto it or dipping it very quickly in and out of the tub of water then lay it on the sponge or cloth to absorb any excess water, this also prevents the paper from becoming soggy or the ink/colours running. I would do this with a few pieces at a time. Then pick it up with glue brush and proceed to place on box as above.
- Once the whole box is covered, allow this base coat to dry completely.
- Once dry you can then add further detail, for example as this has a summer sky background , possibly images of kites (the strings can be drawn on with pen once dry) seagulls, butterflies and bumble bees that have been cut out neatly, these can be placed sporadically over the box and lid.
- Leave this layer to dry.
- If you wish to add a label to the lid this would be a good point to do it.
- Then take your craft glue for example mod-podge and cover the whole box with around 3 layers of glue leaving each layer to dry in between, it’s a good idea to use a bigger brush to do this as it will give a smoother finish. These layers will seal and protect your finished design.
- Once this is completed you can then add other elements to your memory box such as ribbon, gems, buttons or glitter etc.
- Fill with summer memorabilia, a postcard from a friend, a ticket to an attraction, photos, the wristband from a festival, the sea smoothed piece of glass your child found, the summer artwork your child made, pressed flowers from your garden, the pebble your child insisted was a fossil and carried in their pocket all summer, the certificate from the school summer camp, the autograph of that slightly famous local celebrity, the fairground trinket you won , the amazing feather and leaves your child collected on the Sunday morning walk, the magazine clipping featuring your friend’s fantastic charity work- whatever feels right and special to you.
- Once you have mastered decoupage, the same method can be used on all sorts of household items, it’s a great way to update décor and refresh tired items , for example picture frames, mirrors, vases, plant pots even bigger pieces of furniture such as side tables shelves and draw units- nothing is safe once you get going.
Salt dough handprint plaque
While many of are still missing loved ones, this is a lovely gift for a child to make and send to a relative they are missing or a keepsake to hang on your own wall.
Checklist:
- 250g plain flour
- 125g table salt
- 125ml warm water
- Preheat your oven to the lowest setting.
- Mix together the ingredients until they form a dough.
- Lightly flour a surface and place the dough on it, then knead until it becomes smooth.
- Roll the dough out until it’s about 1.5cms thick
- Use a bowl as a stencil to create a neat round plaque shape, or you can make a heart shape, I suggest making a paper template to cut around for this. At this point if you intend to hang it, make a hole with the end of a pencil at least 1.5cms in from the edge of the top of the plaque, this will be to thread ribbon through to hang it.
- Once you are happy with the plaque shape you can then press your hand or your child’s hand/foot (if small enough) into the plaque, deep enough to get a good imprint but not that it distorts the plaque too much or makes the dough to thin. You can also add a name or date if you wish.
- Carefully slide your plaque onto a lined baking sheet and bake for 3 hours or until solid.
- Once you have allowed it to cool, then you can decorate it with paint or glitter, either just the imprint or the whole plaque.
- Allow to dry and then optionally you can coat it with one or two layers of mod-podge craft glue which will act as a sealant and give your creation a longer life.
- Thread ribbon through the hole at the top of the plaque and then it is complete.
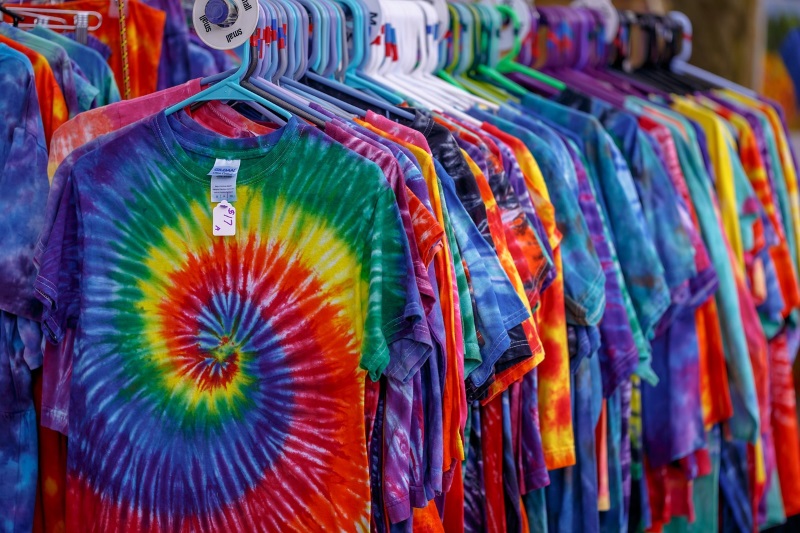
Tie die a t-shirt
Tie-dying is all the rage this summer, and it’s a great way to salvage that white t-shirt that you accidently put in with the colour wash. Children can take part but obviously younger children will need supervision.
Checklist:
- One sorry looking white t-shirt preferably cotton or natural fabric as they absorb the dye better than man-made fabrics.
- Purchase a tie-dye kit with the colours of your choice.
- Elastic bands if not supplied in kit
Directions:
- Wash the t-shirt as it needs to be clean and damp to dye. (Don’t use fabric softener)
- Lay your t-shirt on a large flat surface.
- Pinch the fabric in the middle of your t-shirt or where you want the spiral pattern to start.
- Twist from this point until all the fabric is in a spiral shape.
- Once your fabric is twisted into a tight spiral, wrap 3 to 4 rubber bands around it to secure. Crisscross the rubber bands to create 6 to 8 wedge shapes for adding tie dye.
- Mix your tie dye kit colours according to the kit instructions, you can use a different colour for each “wedge” or just one colour it is up to you.
- Apply your chosen colours to each wedge and then turn the wedge over and repeat the process.
- Leave your colours to set for between 6 to 8 hours, the longer the time the brighter the colours
- Wash as per the t-shirts laundry instructions
- Wear your newly colourful and spiral patterned t-shirt with style, you can experiment with different types of fabric twisting and binding to create different patterned tie-dye and different fabric items
Related
Comments
Comments are disabled for this post.


